
The test result after completing the survey
This option is useful, for example, when creating knowledge tests. It allows the respondent to become familiar with their own level of knowledge on the surveyed topic. Using this option, it is possible to display the test results along with their interpretation, e.g., "Test result: 48/50 points. Congratulations! Great result."
How to display the result to the respondent after completing the survey?
First, we must define the survey type as a Test. To do this, click on the CREATION tab, and then Survey settings.
In the menu regarding the Survey type, select Test.
In the After completing the survey form field, select Display test result after completion if you want to display the point score, and Display feedback after completion if you want to display the interpretation of this result. You can select one of these options or both.
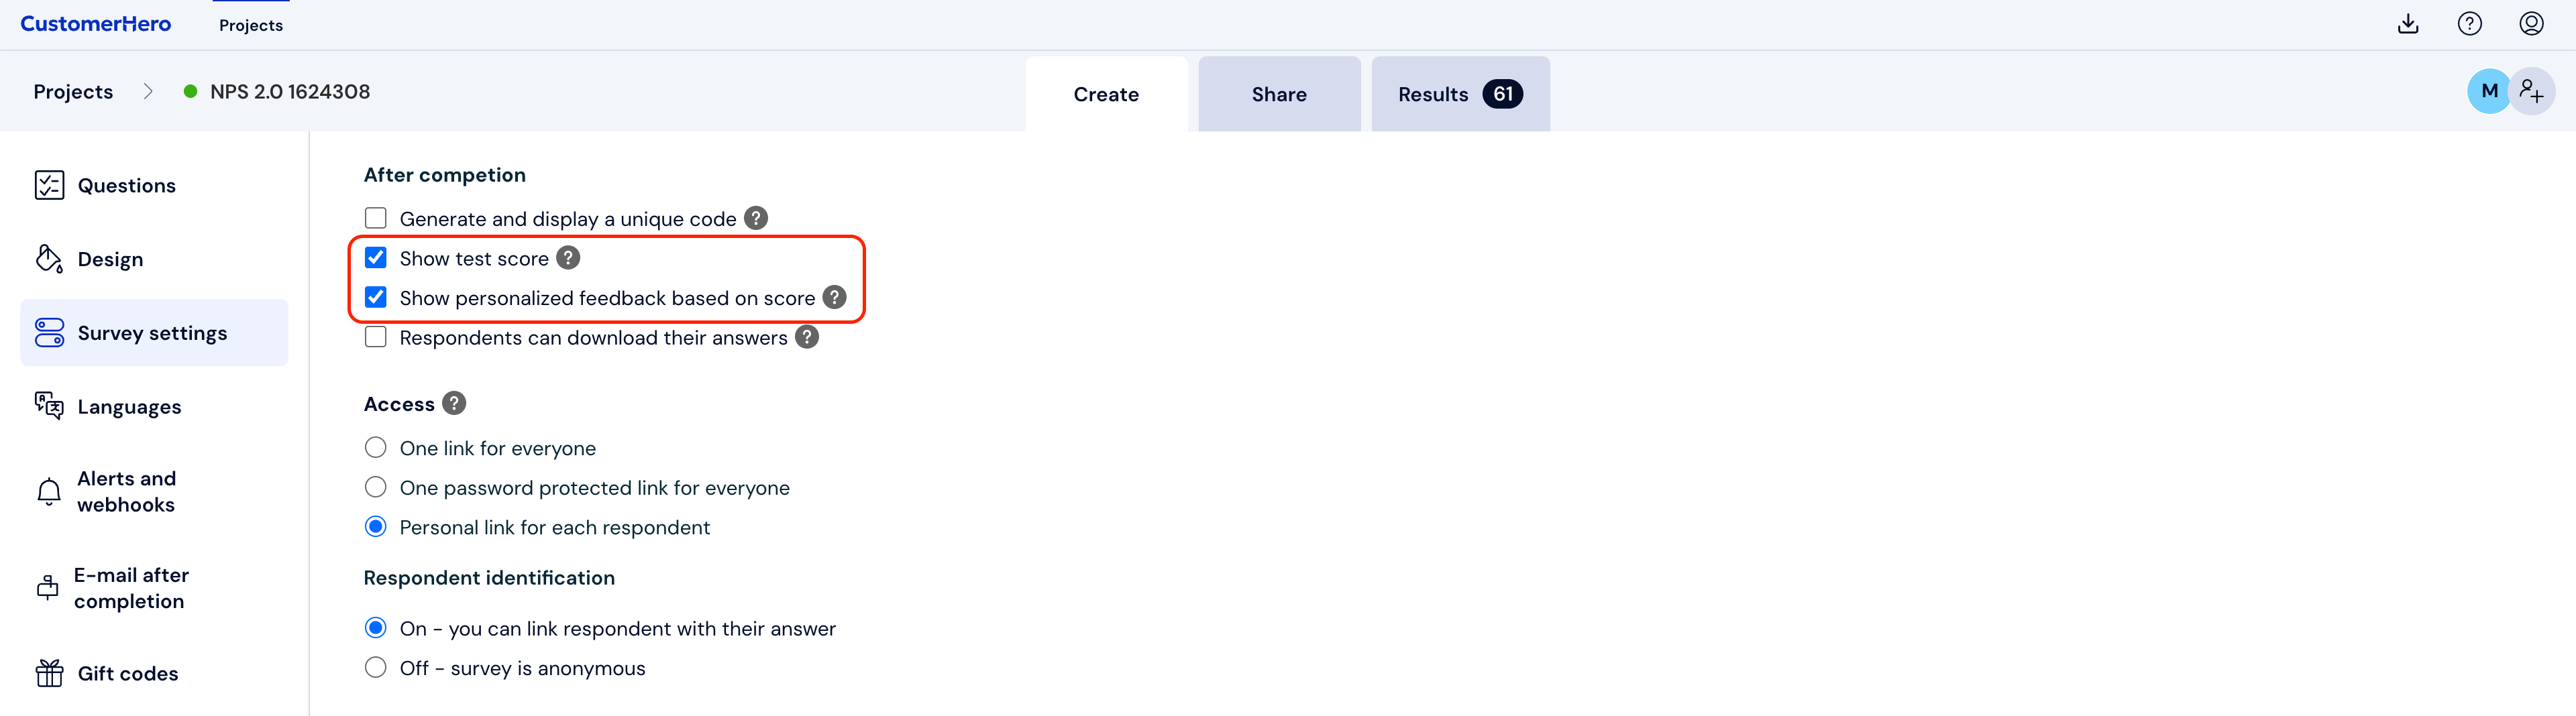
Confirm the introduced changes by clicking Save at the end of the survey settings menu. At this point, it is also worth mentioning the need to assign points (weights) to the answers for individual questions. This is necessary to ultimately receive feedback. You can read about how to do this in this article.
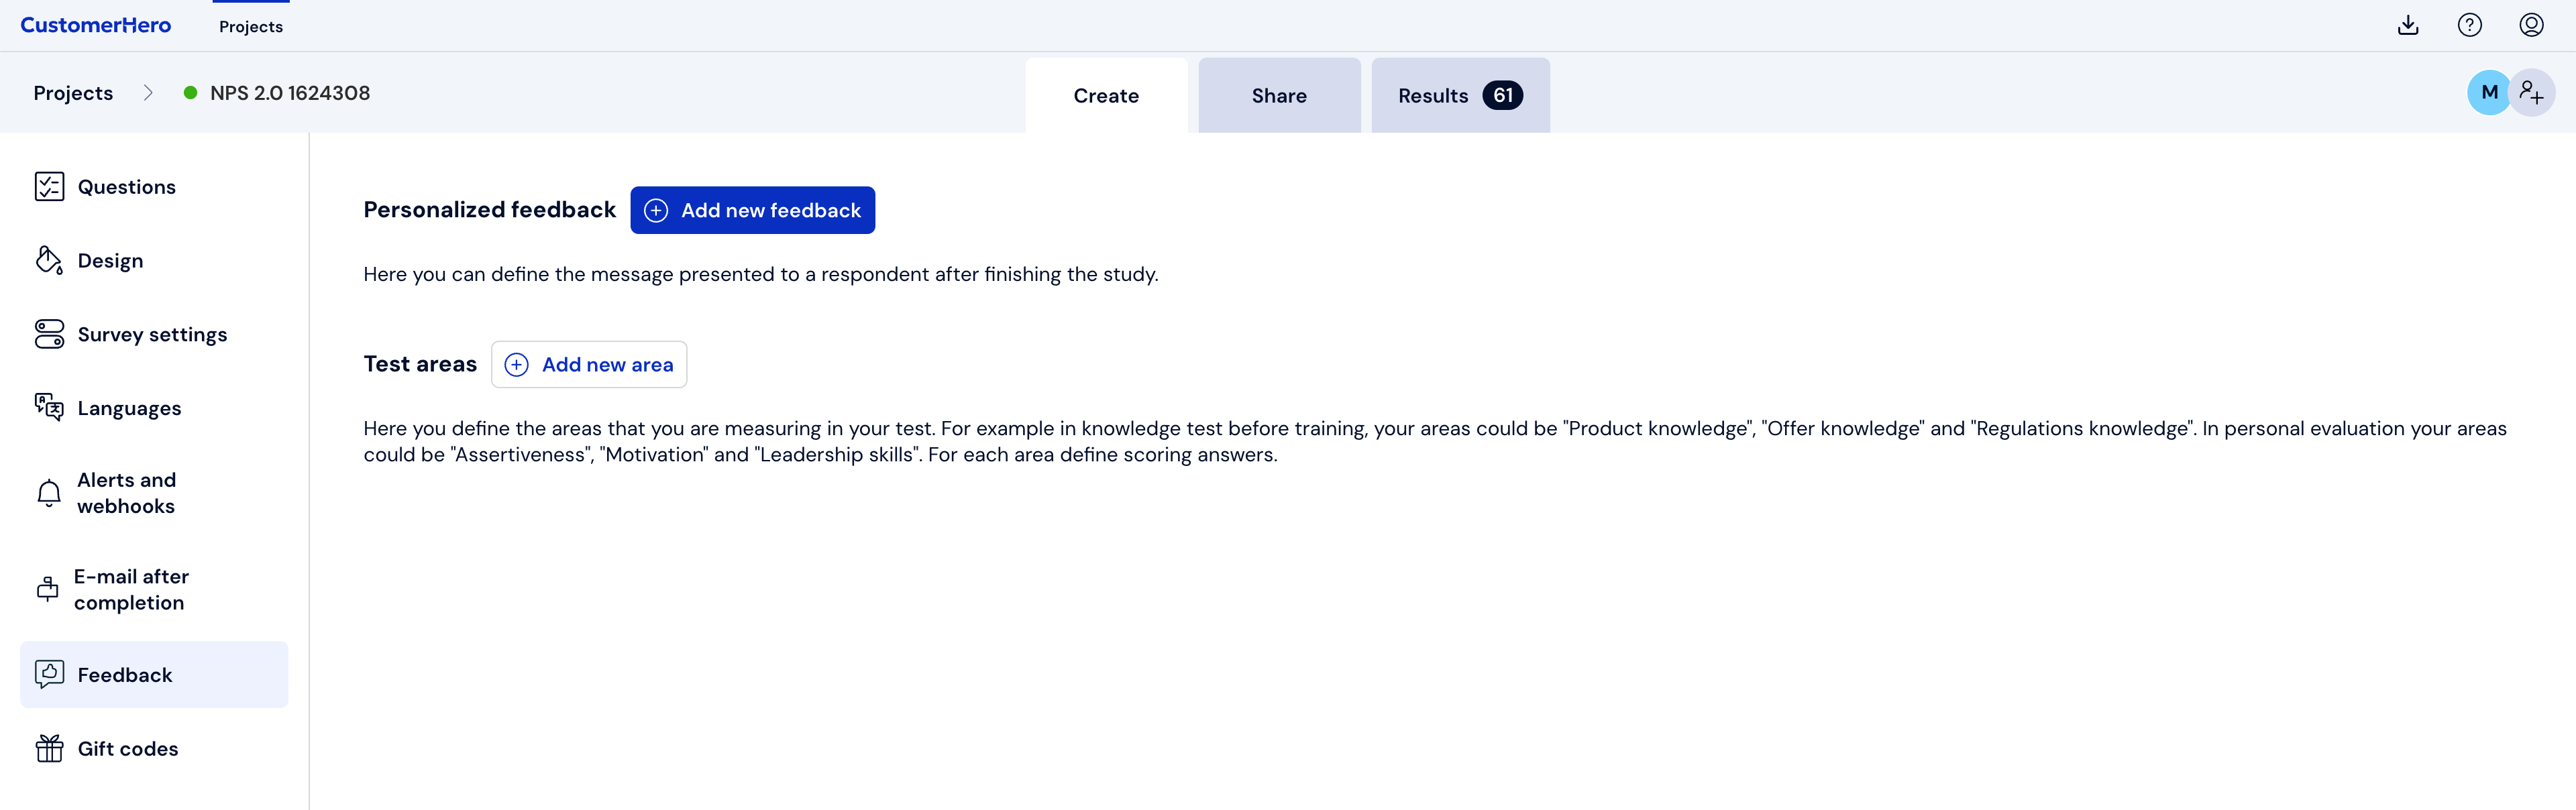
Next, click the CREATION tab again, and then Feedback.
If the Test is divided into topics examining different areas, use the Add area button to create the desired number of areas to examine (e.g., knowledge, morality, etc.).
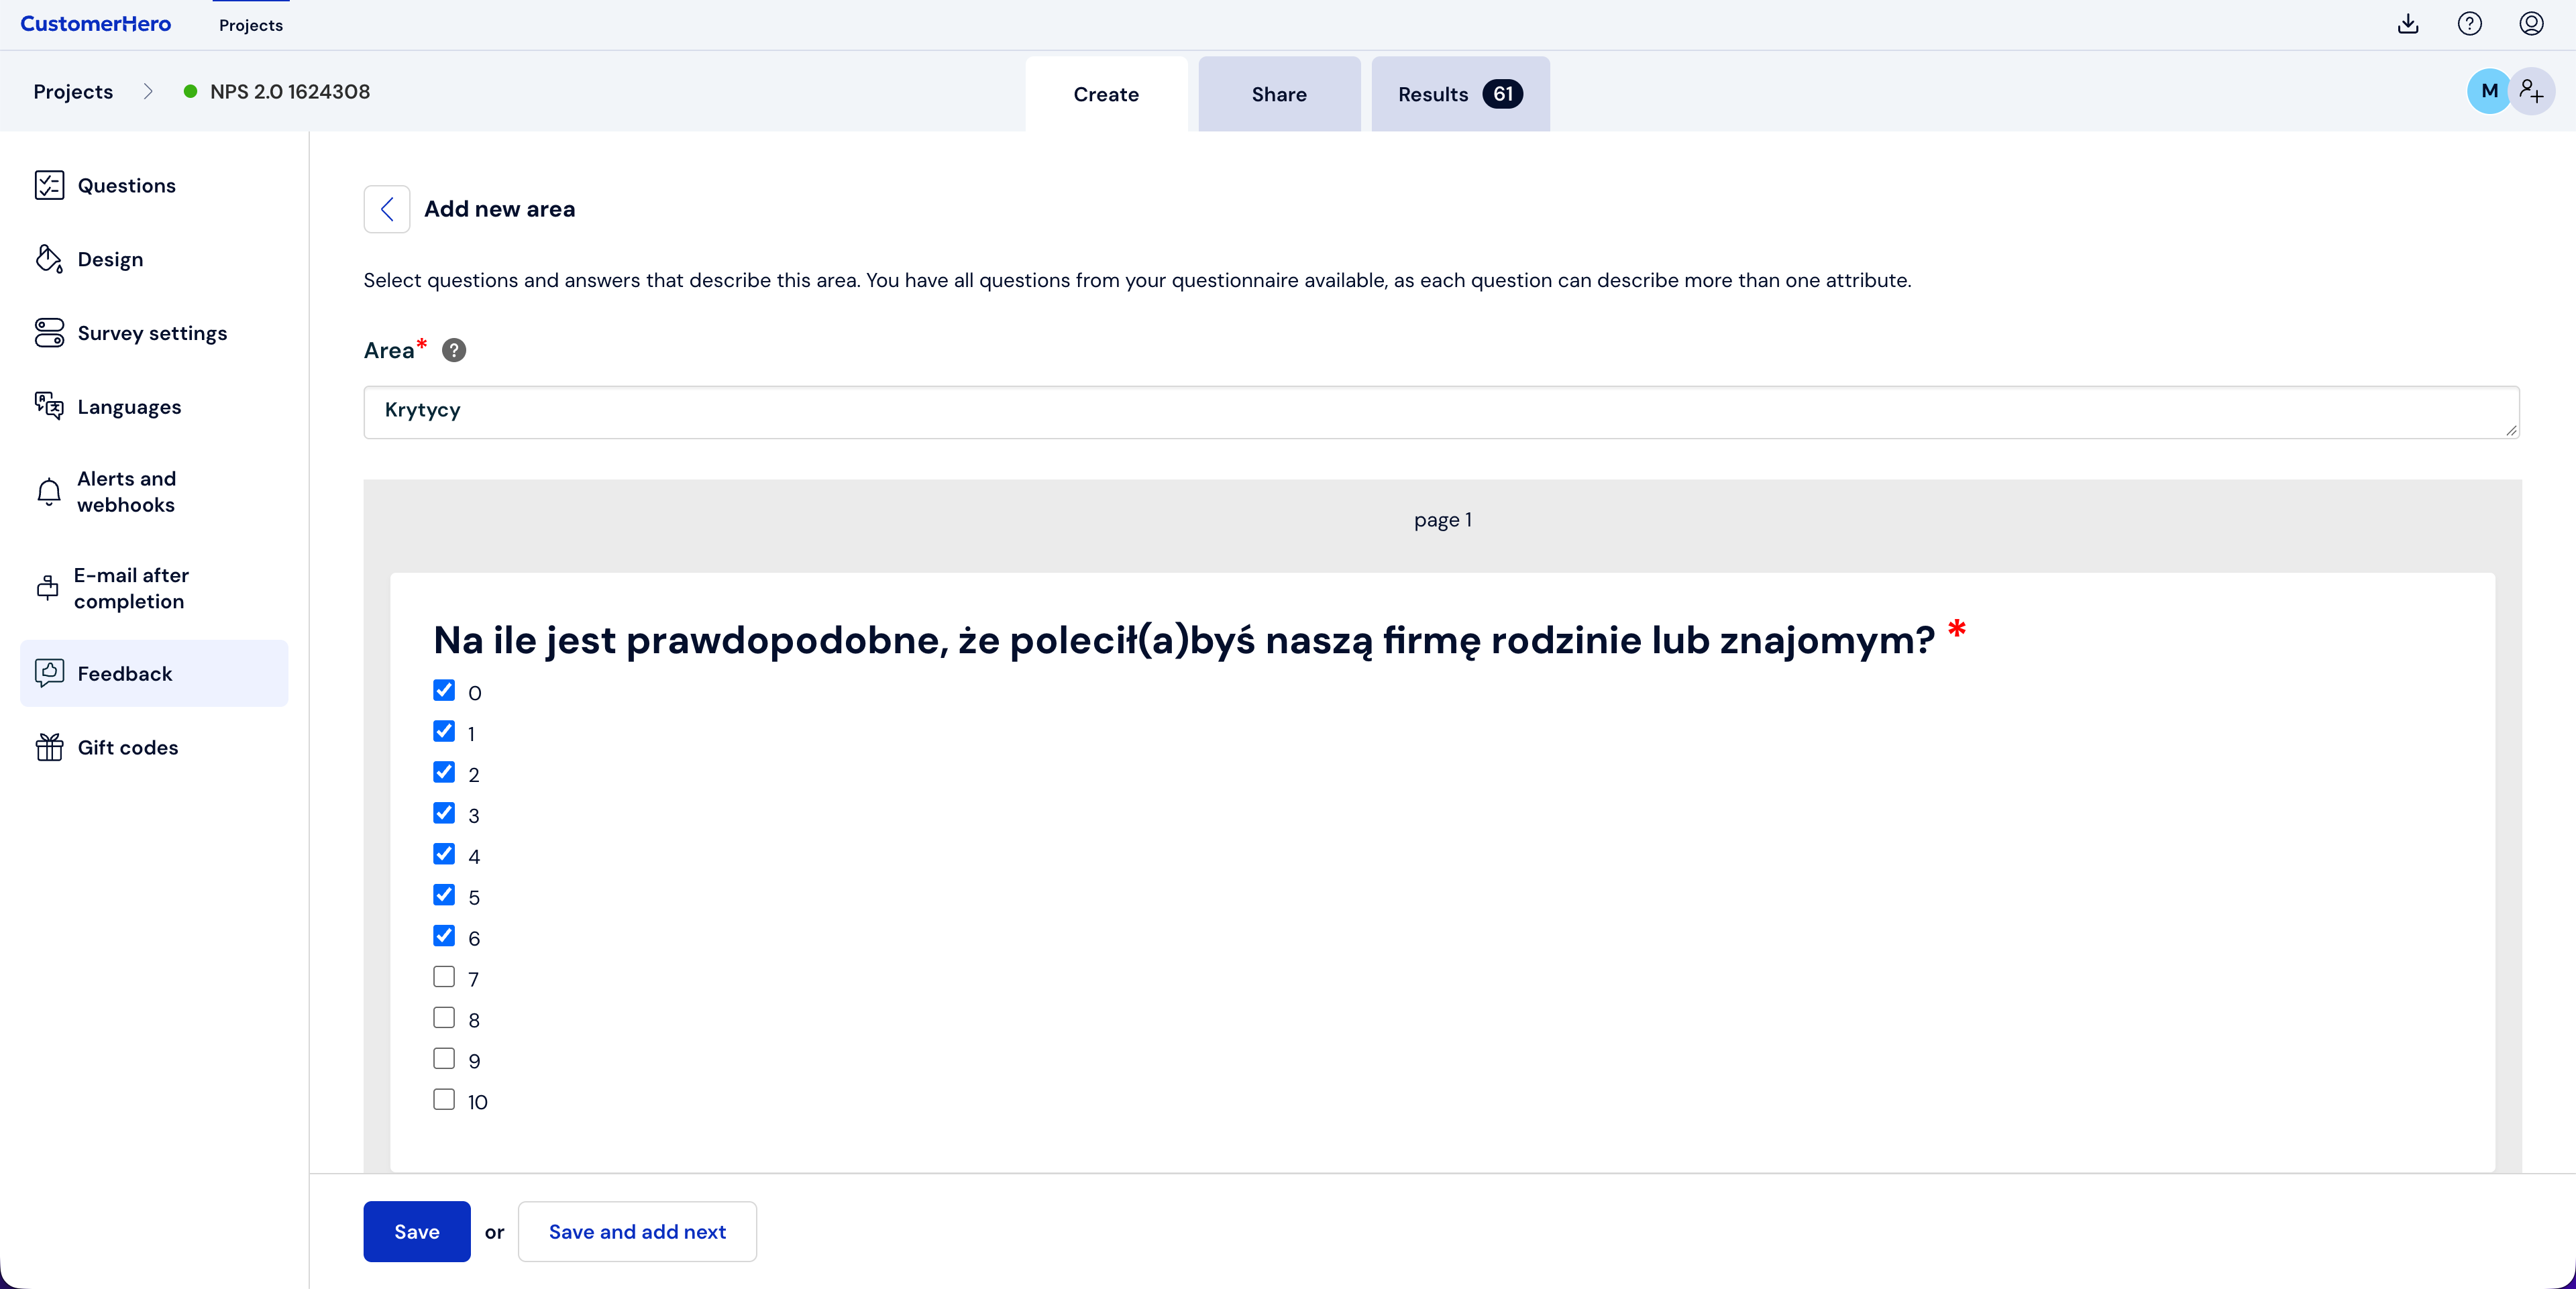
Name the area, and then select the answers in specific questions that make up this area.
Save the area and return to the Feedback menu, or click Save and add next to complete the list of created areas.
In the main menu regarding Feedback, click Add feedback.
Name the provided information (e.g., Knowledge result) in the form field.
Specify the conditions that the area results must meet to display feedback to the respondent: select the area name, the condition for this area's result (average or sum of points), the greater than/less than/equal to condition, specify whether the result should apply to the absolute value or the area value, and what area it should be.
To add another condition, click the (+) button, then proceed as in the previous step.
In the "Display the following survey ending" field, enter the feedback that should be displayed to the respondent after meeting the previously specified condition regarding their obtained results.
Click Save to confirm the changes and return to the list, or Save and add next to create a list of new conditions for other areas.
To discard the introduced changes and return to the feedback menu, click Return to list.
What is worth remembering?
Displaying results to the respondent is possible only and exclusively when the questionnaire is a TEST and not a survey. (See how to create a Test).
You can create a questionnaire examining several areas and display an interpretation for each of them.
This option is available only if we have previously assigned points to the answers (See how).